Hello community,
Preliminary notes:
QNX is a Unix-like microkernel real-time OS, primarily targeted for embedded devices and which some of you might remember for its amazing 1.44 MB floppy demo from mid '90s sporting a fully bootable OS, GUI, mouse support, modem/network support, file manager and so on.
As I played with that demo back in the '90s on my real DX/4 and after testing it successfully on ao486, I began my quest on getting full QNX installation working and this 4.25 version worked best amongst ones tested on ao486 and even if this will be a long reading, the installation is actually pretty simple and mostly GUI driven with minor modifications.
I made this post quite a lengthy one (including screenshots) because I wanted it to be as detailed as I could (mind you I am no expert at all, just re-discovering an old nerdly fling).
You can also find useful links about this OS, Photon GUI and lot more in the links attached in the end of this document plus some extra throughout the how-to.
What can you do with this OS ?
Well, for sure it is not a gaming friendly OS, but it has some nice capabilities (very short list, mainly from default install iso, but a lot more 3rd party software exists):
- Great GUI, with a default of 9 virtual screens, quite snappy if no background is used
- Use Watcom C/C++ compilers, Photon microGUI, TCP/IP, Voyager SDKs and some other development tools to program whatever you want
- Voyager browser (not supporting HTTPS, but that is expected for that era). As always, FrogFind or TheOldNet sites can be tested and used
- Use PhIRC (Photon IRC), telnet, FTP and other network related apps to get online (some BBS/terminal software also exists as well, but didn't check in detail yet)
- Play Doom 1 and some other games for QNX (Wolf3D is still WIP to get it working, there are also some other games written by community)
- For sure a lot more if you're into Unix/networking area, so have fun exploring it !
Additional and important notes:
- AFAIK this QNX OS version and/or SOME of the packages, be them QNX official or 3rd party, might not be freeware so it is up to you to source the related software/licenses presented in this how-to. Google and usual archiving site(s) can help you.
There is an OpenQNX community/forum as well which might shed more light on this subject (other than asking directly BlackBerry), but I didn't join them (yet), though I used a lot of their links/discussions in my research, see links at the end. - A second post detailing how to make a dual-boot MS-DOS/Windoze and QNX VHD will follow soon. Tested so far only DOS 7.1 (my usual setup) and QNX dual booting, works without any issues and I can mount the DOS partition and transfer files etc.
- Still WIP: getting QNX to work with higher resolutions than vga4 (640x480 x 16 colors) it uses as default
- Please ignore the annoying start menu appearing in some screenshots, but QNX treats Win key (from Win+PrtScr shortcut) in the same way as Windoze does it

After this somewhat lengthy intro, let's get to the good stuff !
QNX 4.25 mini how-to:
- Get QNX (for this image the 4.25 CD ISO was used): https://winworldpc.com/product/qnx/425
- Create a VHD raw image (260+ megs), for this example I made a 450 MB one from MiSTer ARM Linux side (F9/SSH into it etc):
Code: Select all
cd /media/fat/games/ao486 dd if=/dev/zero of=450M-QNX.vhd status=progress bs=1M count=450 - Mount the VHD as IDE 0-0
- Mount the CD ISO image as IDE 1-0
- Change the booting sequence from Floppy/HDD to CD-ROM (OSD - Hardware - Boot 1st)
- OSD - Apply and reboot
- After booting QNX from CD, you will be presented with a GUI and the QNX Installer will appear and take over:
- qnx1.png (61.49 KiB) Viewed 628 times
Installation process is mostly GUI driven, so in the first installer screen, hit Next button (or F2) to advance to hardware detection:
- qnx2.png (30.99 KiB) Viewed 628 times
After HW detection, hit Next/F2 again.
- qnx3.png (28.26 KiB) Viewed 628 times
On this screen adjust your regional settings, modify date/time if you like and when ready hit Next/F2.
On next page read and agree Terms of Use. Hit Agree/F4 to advance to partitioning section:
- qnx4.png (28.23 KiB) Viewed 628 times
Since it is a new install, just hit Next/F2 and then "Create Partition" button on the pop-up window that appears.
- qnx5.png (18.06 KiB) Viewed 628 times
In the following screen, New Install should be active. You may click on Make Boot Floppy if you really wish so (mount an empty FDD image on Floppy A drive in OSD).
Leave QNX node number to 1 and hit Next/F2.
- qnx6.png (31.96 KiB) Viewed 628 times
After installer partitions and formats the VHD, in the next screen you will need to enter License Number for EVERY package you wish to install (14 on this ISO)
*Where to get licenses ? Google is a trusty friend. Since I don't know the status of these packages (from commercial perspective), I cannot share them.
After each license being introduced manually (if you want to automate things, you can put them later on a floppy, more reading : https://www.mikecramer.com/qnx/qnx_4.25 ... cense.html), press F5 (or click Add button) to add it.
If license number is correct (or not), a pop up will appear and after you can add more licenses (or correct typos).
When you're done adding licenses, hit Done/F3 then select packages you want installed (QNX OS being the minimum).
- qnx7.png (36.65 KiB) Viewed 628 times
When you ready, hit Start/F2 and the installation of selected packages will begin.
- qnx8.png (54.5 KiB) Viewed 628 times
Say Yes to "Boot directly into Photon" pop-up that will appear.
- qnx9.png (38.93 KiB) Viewed 628 times
Hit Yes on the next "Do you want to probe and set video modes now?" pop-up window that will appear next.
Wait a bit for QNX to test out ao486 then in the new window select the vga4 Driver family and vga4 640x480 16 colors mode for now.
Click Done/F2 when ready.
- qnx10.png (24.13 KiB) Viewed 628 times
When "TCP/IP configuration" window appears, click on the "Enable TCP/IP Client" (under Basic tab/TCP/IP Mode) and change the DNS server to your own network one (usually the router's IP address) or Google's 8.8.8.8.
Leave everything else as it is and click Done.
- qnx11.png (32.87 KiB) Viewed 628 times
Installation will continue copying the remaining packages. When it's done, click Finish/F3.
*If you opted that you need a boot floppy made, a pop-up will prompt you to mount the empty image in Floppy A. Mount an empty 1.44MB FDD image in the OSD, hit Ok when done so.
- qnx12.png (15.57 KiB) Viewed 628 times
Congrats, you have a working QNX OS 4.25 on ao486 ! There are still modifications to be made (you can of course do them in CLI or later in GUI) but for the moment just press Finish/F3 and keep CD ISO mounted, as well as boot sequence.
The system will reboot, do the same steps with Next/Next for HW detection/regional settings/terms of use, and when you reach Partitioning page:
- qnx13.png (27.06 KiB) Viewed 628 times
Press Allow Upgrades/F7. Then Next/F2. Hit Yes/Next on following popups and pages to advance and the final Finish/F3 on the Packages pages.
You will be now presented with a different screen, allowing you to quickly modify /etc/config/sysinit.1 (the main system initialization file for the OS/node) and the /etc/config/altsysinit (the alternate sysinit file, allowing you to boot directly in CLI instead of GUI):
- qnx14.png (33.02 KiB) Viewed 628 times
Modify Sysinit file panel (left side one, case sensitive) to have CD-ROM support in IDE 1 slot:
The line
Code: Select all
/bin/Fsys.eide fsys -Ndsk1 -n0=hd1. -n5=cd1. eide -a170 -i15changes into
Code: Select all
/bin/Fsys.eide fsys -Ndsk1 -n5=cd1. eide -a170 -i15Duplicate the new "/bin/Fsys.eide fsys -Ndsk1 -n5=cd1. eide -a170 -i15" line right under itself (for some reasons CD driver doesn't kick in properly first time)
*Additionally you can comment out (add # in front) this line "Dev.par &" - it's the parallel printer device, no need for it.
*Useful is also to comment out last lines referring to tcpip.$NODE ("if test -f /path/tcpip.$NODE" ... until next "fi" line), we will add PPP support later.
When done, click the "Install this sysinit file" button.
Modify OS Build File (right side one):
The line
Code: Select all
$ /bin/Fsys.eide fsys -Ndsk0 -n0=hd0. -n5=cd0. eide -a1f0 -i14changes into
Code: Select all
$ /bin/Fsys.eide fsys -Ndsk0 -n0=hd0. eide -a1f0 -i14No need for CD on IDE 0, hence the above modification.
When done, click on "Regenerate and install Boot Image" button then click Next/F2.
We're reaching the final stage, the final Congratulations screen will appear.
Change the booting sequence back to Floppy/HDD (unmount the boot one if you created it during setup) and click Reboot/F3.
After reboot, log in with root, no password (you can always put one later) and you will be booted into QNX GUI , Photon.
If you don't like it/need pure console, hit ESC during boot sequence ("Press ESC for alternate OS") to get into console mode:
- 20240511_001612-screen.png (22.9 KiB) Viewed 628 times
As earlier said, you can do above modifications at a later point directly from CLI or GUI), using VEdit text editor, very intuitive to use:
Code: Select all
vedit /etc/config/sysinit.1
vedit /etc/config/altsysinit- sysinit.png (56.58 KiB) Viewed 628 times
Extra goodies:
A. PPP support and easy to transfer way via FTP
If not set already when asked during setup process, edit /etc/resolv.conf DNS servers to ones from your network (usually the router) or Google's 8.8.8.8
From a terminal issue following commands:
Code: Select all
/bin/stty baud=115200 bits=8 stopb=1 par=none -hupcl +raw < /dev/ser1
/usr/ucb/Socket -p1 node1 &
/usr/ucb/pppd defaultroute /dev/ser1 &
** You can also put these commands in a file for easier use (e.g. /usr/bin/ppp.sh). Use VEdit and do not forget to hit Enter after last line in the file.
** To connect automatically on boot, replace the lines in /etc/config/sysinit.1 referring to tcpip.$NODE ("if test -f /path/tcpip.$NODE ... until next fi commands) with
Code: Select all
. /usr/bin/ppp.sh ** You can add the same ". /usr/bin/ppp.sh" in the /etc/config/altsysinit file if you also want automatic PPP connection when booting in CLI
Reminder: QNX is case sensitive, so please use the commands as they are written, including spaces/upper/lower cases etc !
** Make sure you have PPP selected in OSD (bring it up with Win+F12, second page, set the "UART Connection" to "PPP", Baud to "115200" and save it).
Check connection with ifconfig ppp0/netstat/ping google.com, it should work fine. You can use Voyager browser to surf HTTP only pages, PhIRC for IRC and whatnot.
You have also FTP, so in case you want some extra files brought into the VHD, copy them on a folder of convenience on ARM side (like "/media/fat/games/ao486/QNX_progs/" --- NO SPACES)
From a QNX terminal issue a "ftp Your_MiSTer_Linux_IP", and after connecting just get or mget what you need from that folder to your QNX VHD.
You can also install MC (Midnight Commander) port for QNX and use it to FTP transfer your files from ARM side. Found out it doesn't like to transfer large batches of files, but for 5-10 files at once it's no issue, plus those usually are tar.gz archives. If it throws a memory error, then lower the number of batched files for transfer.
- MC_ftp.png (80.73 KiB) Viewed 572 times
As stated at the beginning, PhIRC (IRC client) and Voyager (HTTP web browser work quite nice:
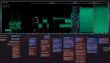
- PhIRC.png (105.89 KiB) Viewed 572 times
- 20240214_194310-screen.png (159.97 KiB) Viewed 572 times
B. Upgrading QNX
- qnx15.png (45.77 KiB) Viewed 628 times
Get QNX4CD.110614 (not bootable). Boot QNX with CD-ROM support and click on the last icon in first row of Desktop Manager (Add/Remove progs).
You definitely want TCP/IP 5.1, so click on it. The rest of the packages you need to dive into their respective tree and select the last patch.
When done, press Start/F2.
Click Yes to use TCP/IP 5.1 instead of 4.25 and No to re-configure it (DNS server should be already set by now) pop-ups that will appear.
See point A above for setting PPP over serial on stock 4.25 and point C below on how to change the syntax in the new version.
C. Since TCP/IP 5.1 the commands for connecting PPP will change to:
Code: Select all
/bin/stty baud=115200 bits=8 stopb=1 par=none -hupcl +raw < /dev/ser1
/usr/ucb/Tcpip -v1 node1 &
/usr/ucb/pppd defaultroute /dev/ser1 &
export SYSNAME=qnx4 &
** As above on point A, you may put these commands in a script file in PATH (/usr/bin/ppp.sh is a good location) and don't forget having a last Enter after last line.
** To connect automatically on boot, replace the lines in /etc/config/sysinit.1 referring to tcpip.$NODE ("if test -f /path/tcpip.$NODE ... until next fi) with ". /usr/bin/ppp.sh"
** You can add the same ". /usr/bin/ppp.sh" in the /etc/config/altsysinit file if you also want automatic PPP connection when booting in CLI
D. Sound Blaster support (bit finicky with some programs)
From a console issue:
Code: Select all
Audio sb -b220 -i7 -d1 &E. Path autocompletion
If you need autocomplete when using the CLI (like TAB in linux), the shortcut is ESC+ESC (double ESC) if the folder/file names are unique.
F. Archived files
Usually programs come archived in .tar.gz/.tgz/.gz, so you need to decompress them (note some archivers like bunzip2/rar/arc need to be installed first):
Also, note that most programs have a .readme (or similar) file detailing its installation (if other than the common commands as below)
Usual commands:
gzip -d name.tar.gz | tar -xv
gzip -d name.tgz | tar -xv
gzip -d name.gz
…tgz or .tar.gz:
gunzip -c file.tgz | tar -xvf-
…tar.bz2:
bunzip2 -c file.tar.bz2 | tar -xvf-
G. VEdit - very nice text editor, both for CLI or GUI, it is included in the main distro
Just run "vedit filename.xyz" on a console, very intuitive to use
- VEdit GUI.png (53.53 KiB) Viewed 628 times
H. Doom and Wolf3D for QNX
QNXDoom works nice from console (cdoom), audio just music and sometimes accelerated/sometimes choppy/off notes. No SFX it seems.
Un-compress QNX doom and add shareware WAD file in the same folder. You also need to run "int10 &" before running "cdoom"
Photon Doom (phdoom) in window has choppy music/gameplay but SFX works just fine... lol.
Wolf3D couldn't make it work yet...
- 20240215_201517-screen.png (425.36 KiB) Viewed 628 times
I. Useful links:
https://www.mikecramer.com/qnx/qnx_4.25 ... okset.html
https://www.qnx.com/developers/docs/qnx ... okset.html
https://www.qnx.com/developers/docs/qnx ... okset.html
https://forums.openqnx.com/categories
https://forums.openqnx.com/c/10-category/11-category/11
Thank you for having the patience to read this long post, hope you will find it useful ![]() Any comments/tests/ideas of improvement would be highly appreciated !
Any comments/tests/ideas of improvement would be highly appreciated !